PDF Download: [Procedure for manufacturing a standard tubular test cell (1).pdf](http://stanslegacy.com/attachments/58)
> Procedure for manufacturing a standard tubular test cell. #### Parts List| T33 Water Filter Cartridge Housing | [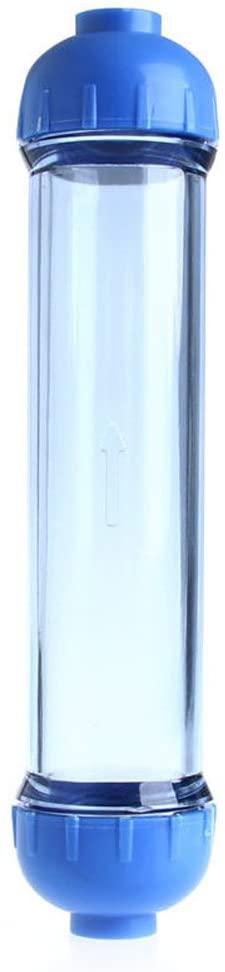](http://stanslegacy.com/uploads/images/gallery/2022-06/Yu5x0SMsuT3bHCti-51oxo1vpuyl-ac-sx522.jpg) | [Example 1](https://www.aliexpress.com/item/2251832763553712.html?gps-id=pcDetail404&scm=1007.16891.96945.0&scm_id=1007.16891.96945.0&scm-url=1007.16891.96945.0&pvid=7a00b93e-f039-463e-a3c9-e7390be10d07&_t=gps-id%3ApcDetail404%2Cscm-url%3A1007.16891.96945.0%2Cpvid%3A7a00b93e-f039-463e-a3c9-e7390be10d07%2Ctpp_buckets%3A668%230%23131923%2396_668%230%23131923%2396_668%23888%233325%2318_668%23888%233325%2318_668%232846%238108%231977_668%232717%237566%23834__668%233374%2315176%23431_668%232846%238108%231977_668%232717%237566%23834_668%233164%239976%23880_668%233374%2315176%23431&gatewayAdapt=4itemAdapt) [Example 2](https://www.amazon.com/YOEDAF-Housing-Purifier-Refillable-Transparent/dp/B07J5B7PXM/ref=asc_df_B07J5B7PXM/?tag=hyprod-20&linkCode=df0&hvadid=312323295970&hvpos=&hvnetw=g&hvrand=13292041307042212722&hvpone=&hvptwo=&hvqmt=&hvdev=c&hvdvcmdl=&hvlocint=&hvlocphy=9016396&hvtargid=pla-646809454782&psc=1) |
| Waterproof cable gland M8\*1.5. | [](http://stanslegacy.com/uploads/images/gallery/2022-06/BTO8YqwCMdCYad2i-screenshot-from-2022-06-29-21-32-23.png) | [Example](https://www.aliexpress.com/item/32845321344.html?spm=a2g0s.9042311.0.0.e55c6c37GIEAvZ) |
| Optional Nylon Pneumatic Blanking Plug 4mm Hose Tube Push Fit Connector Air Line | [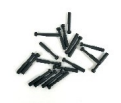](http://stanslegacy.com/uploads/images/gallery/2022-06/fCpDg7BFko9LnAEL-screenshot-from-2022-06-29-21-32-30.png) | |
| MPX5500DP PACKAGING SIP 6 pressure sensor. | [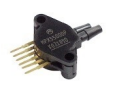](http://stanslegacy.com/uploads/images/gallery/2022-06/kvn8QwSQ2B8dnJj5-screenshot-from-2022-06-29-21-32-35.png) | |
| 6\*4mm polyurethane pneumatic hose . | [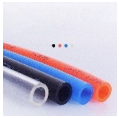](http://stanslegacy.com/uploads/images/gallery/2022-06/BJ3udMdBX7J5jOHB-screenshot-from-2022-06-29-21-32-39.png) | |
| Various 1/4" BSP Thread Tee Type 3 Way Brass Pipe Fitting | [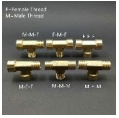](http://stanslegacy.com/uploads/images/gallery/2022-06/HcM6DaBMFSzIiHZK-screenshot-from-2022-06-29-21-32-45.png) | |
| Brass Hex Bushing Reducer Pipe Fitting 1/8” –> 1/4” | [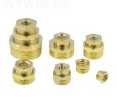](http://stanslegacy.com/uploads/images/gallery/2022-06/aKX4iybhRtvcYVw9-screenshot-from-2022-06-29-21-32-52.png) | |
| 4mm Long Hose Barb x 1/4" Male BSP Thread Brass Barbed Pipe Fitting | [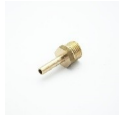](http://stanslegacy.com/uploads/images/gallery/2022-06/Qp8XyGBcKF2Xq6Iq-screenshot-from-2022-06-29-21-32-57.png) | |
| 0~30psi 0~2bar 40 Diameter Fuel Air Compressor Low Pressure Meter. | [](http://stanslegacy.com/uploads/images/gallery/2022-06/PFrTemcGXt0Q5KKY-screenshot-from-2022-06-29-21-33-03.png) | |
| 1/4" mini brass ball valve BSP male to female. | [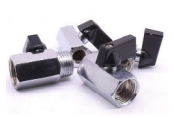](http://stanslegacy.com/uploads/images/gallery/2022-06/tIi7pz28mnu0L6dK-screenshot-from-2022-06-29-21-33-12.png) | |
| 1/4'' 8KG BSP Air Compressor Safety Release Valve Pressure Relief | [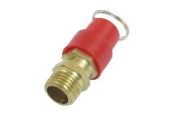](http://stanslegacy.com/uploads/images/gallery/2022-06/rpfeDBCGDGMpCFaV-screenshot-from-2022-06-29-21-33-29.png) | |
| DS18b20 Stainless steel package Waterproof (These will have to be adapted to improve waterproofing see below) | [](http://stanslegacy.com/uploads/images/gallery/2022-06/1pd0RVRS2M4KytSB-screenshot-from-2022-06-29-21-33-34.png) | |
| Heat shrink tube | [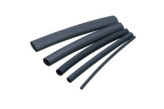](http://stanslegacy.com/uploads/images/gallery/2022-06/yAZLFw1RMzWYdM7O-screenshot-from-2022-06-29-21-33-39.png) | |
| 4mm Banana Plugs Socket Connector | [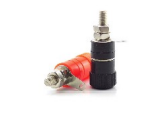](http://stanslegacy.com/uploads/images/gallery/2022-06/ErYWP8ZZZTvRvRQR-screenshot-from-2022-06-29-21-33-44.png) | |
| Thread sealant | [](http://stanslegacy.com/uploads/images/gallery/2022-06/YZsLDjSfIkruA4Pn-screenshot-from-2022-06-29-21-33-52.png) | |
| Teflon tape | [](http://stanslegacy.com/uploads/images/gallery/2022-06/mbXZOzhZMV1nXyoq-screenshot-from-2022-06-29-21-33-57.png) | |
| Epoxy resin. | ||
| Stainless steel tube 304L or 316L: Outer tube 16x2mm or 14x1mm ; 100mm length. Inner tube or rod ext diameter 10mm ; 110mm length. The goal is to get a 1 mm gap between outer and inner tube. | [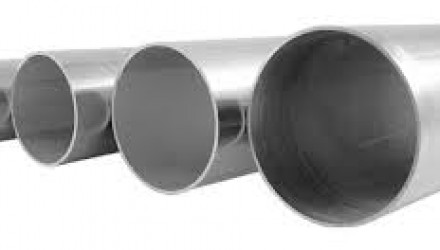](http://stanslegacy.com/uploads/images/gallery/2022-06/GI7Yj10Z9gSWlWG4-zqyfdr5sv2anmcvr-download-3.jpeg) | |
| T33 cell : Bottom, Stand and cap spacer The bottom and the tubes cap spacer have been designed for 16x2mm outer tube and 10mm inner tube. Ask for different dimensions. | [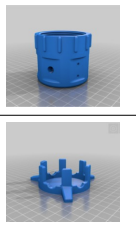](http://stanslegacy.com/uploads/images/gallery/2022-06/3Aq9qJpRKzPdvGUI-screenshot-from-2022-06-29-21-43-42.png) | [ThingVerse STL](https://www.thingiverse.com/thing:4781212) |
The DS18b20 must be sealed with epoxy resin otherwise, the water will leak throw the cable due the pressure inside the cell chamber.
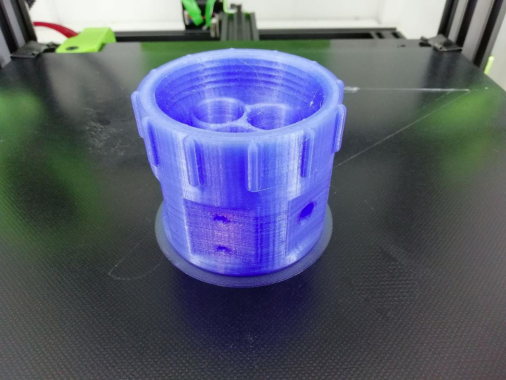
**1- Remove the heat shrink tube protection.** [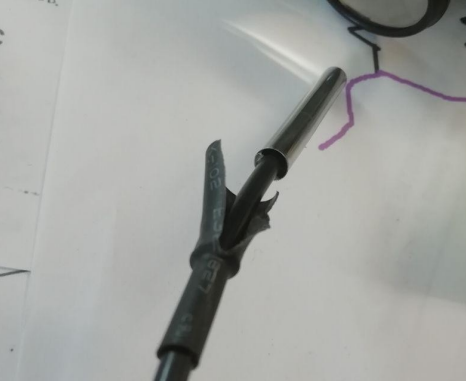](http://stanslegacy.com/uploads/images/gallery/2022-06/pql2ZWBKtPQydNpg-screenshot-from-2022-06-29-21-45-41.png) **2 - Protect the stainless tube with masking tape and pour the tube with epoxy resin.** [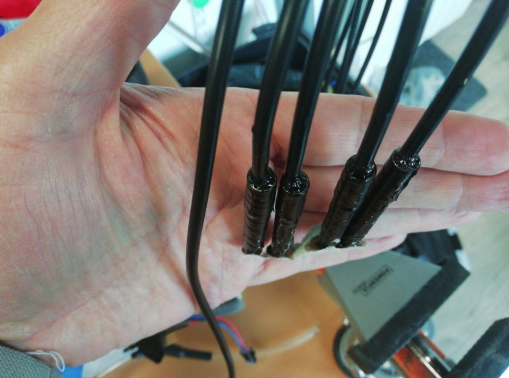](http://stanslegacy.com/uploads/images/gallery/2022-06/f7grkAdX8ENI9nXk-screenshot-from-2022-06-29-21-45-49.png) **3 - Once dry, remove the masking tape.** 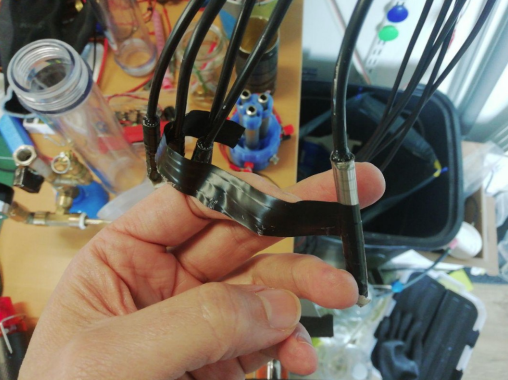 **4 – In order to keep it clean replace the heat shrink tube.** [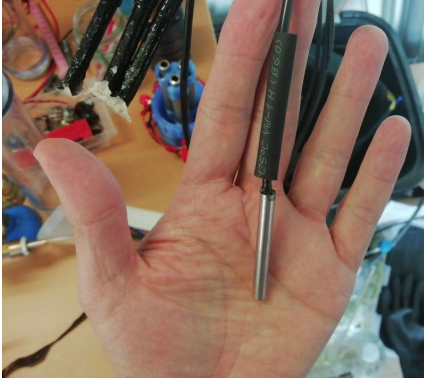](http://stanslegacy.com/uploads/images/gallery/2022-06/SqE0vZJlYYI8vT00-screenshot-from-2022-06-29-21-48-21.png) **5 – The DS18b20 is now ready to be used in a pressurized vessel.** [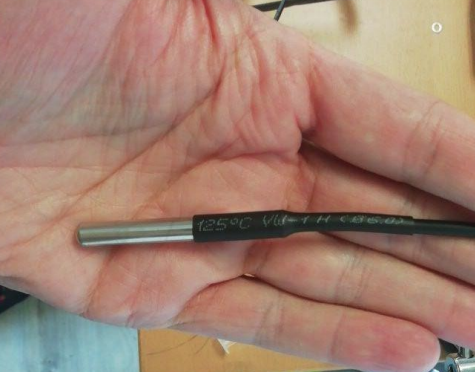](http://stanslegacy.com/uploads/images/gallery/2022-06/J30bIPJOPJreL67i-screenshot-from-2022-06-29-21-48-27.png) ##### T33 Bottom waterproofing: > In order to resist to the pressure and avoiding leaks, the bottom need to be filled with epoxy. > The printing wall thickness needs to be 5 walls in order to get a strong threaded part. > It needs only one 1st layer because it will be removed later. (But at least 1 layer for bed adhesion > purpose). To improve bed adhesion, print with an additional skirt. **1 - Print the bottom.**This type of infill is not necessary. Any kind of infill will allow epoxy to flow and pour the part.
[](http://stanslegacy.com/uploads/images/gallery/2022-06/p7Jq9DV0DQuLyibR-screenshot-from-2022-06-29-21-50-18.png) **2 – Remove the bottom layer.** **[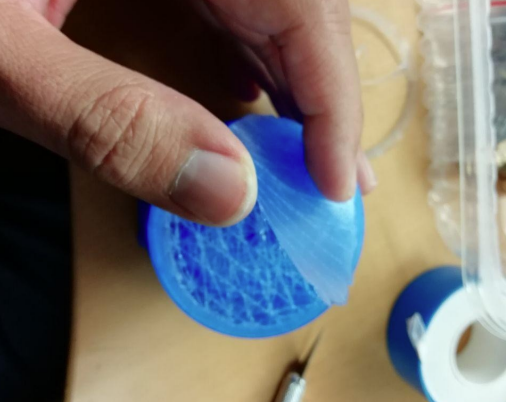](http://stanslegacy.com/uploads/images/gallery/2022-06/xrF1oWSVYXb0v8HL-screenshot-from-2022-06-29-21-51-12.png)** **3 – Pour the cap with epoxy resin.** [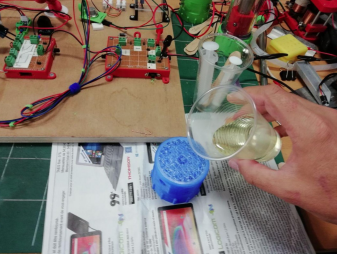](http://stanslegacy.com/uploads/images/gallery/2022-06/U78tfoB2VRezhv7h-screenshot-from-2022-06-30-17-11-29.png) **4 – Take care that the epoxy doesn't leak through the holes. In some cases, it will be useful to plug the orifices with silicone which can then be removed.** [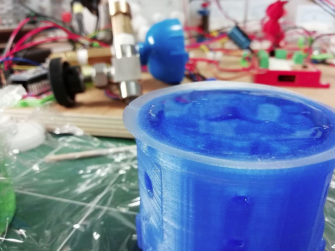](http://stanslegacy.com/uploads/images/gallery/2022-06/xLRltE4ajrnZWvA5-screenshot-from-2022-06-30-17-05-26.png) **5 – Allow it to harden completely before attempting to use it.** **[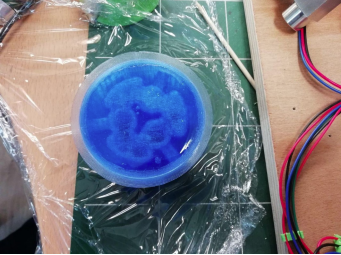](http://stanslegacy.com/uploads/images/gallery/2022-06/7j6SlD88em1amG2P-screenshot-from-2022-06-30-17-05-40.png)** **6 – Install the different connections and fittings.** [](http://stanslegacy.com/uploads/images/gallery/2022-06/j7sQWdVpCOIViHsS-screenshot-from-2022-06-30-17-05-49.png) [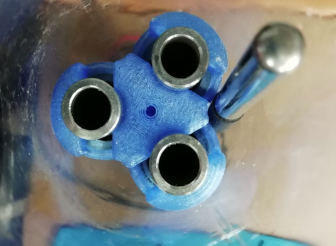](http://stanslegacy.com/uploads/images/gallery/2022-06/sLfGMXrhRA6hPjxq-screenshot-from-2022-06-30-17-05-59.png)There’s many way to connect each components, here is an example of the parts I used:
| [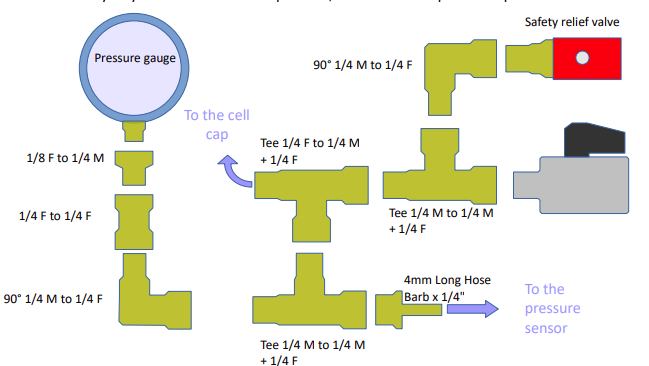](http://stanslegacy.com/uploads/images/gallery/2022-06/ANWpEH99D7TZtyJM-screenshot-from-2022-06-30-17-06-07.png) | [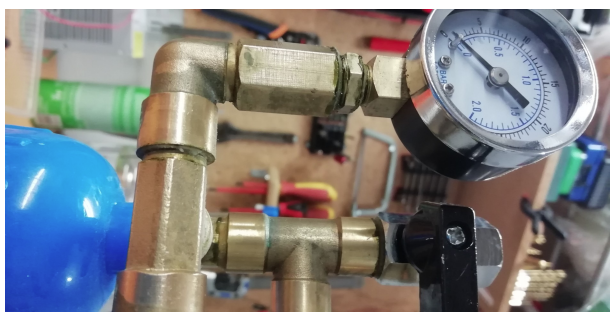](http://stanslegacy.com/uploads/images/gallery/2022-06/ZUndzef6NRA8YWvB-screenshot-from-2022-06-30-17-07-03.png) | [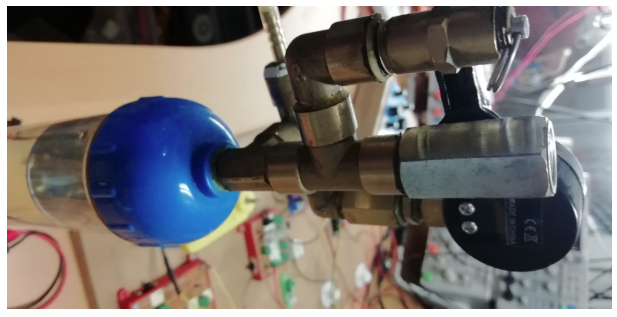](http://stanslegacy.com/uploads/images/gallery/2022-06/SVtK6hZ6pzqUnPyt-screenshot-from-2022-06-30-17-06-44.png) |
| [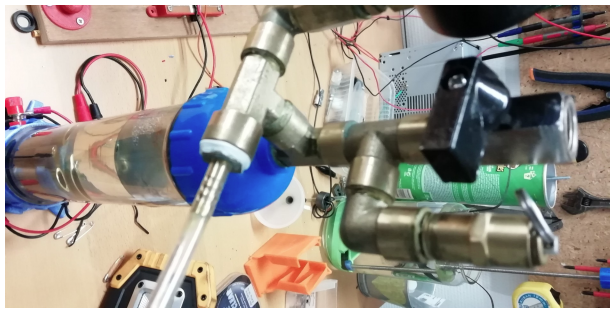](http://stanslegacy.com/uploads/images/gallery/2022-06/ruaIzUMmBUfcaW8A-screenshot-from-2022-06-30-17-06-51.png) | [](http://stanslegacy.com/uploads/images/gallery/2022-06/0m6H81vcI10IyaWm-screenshot-from-2022-06-30-17-06-35.png) |