
ESP32 - Complex Waveform Generator V2
Setting Up The App
ESP32 Complex Waveform Generator - Arrangement for WROOM-32 or WROVER-E (DevKit-C)
Modify
# PARTS Required
- 1 - ESP32 (WROOM-32 or WROVER-32) with 16 exposed pins
- 7 - Rotary Encoders (i.e. KY-040 Rotary Encoder Module CYT1062)
- 1 - +5VREG 1A Power Supply for ESP32 (i.e. ATX PowerSupply)
- Installation Prerequisites
Install ESP Libraries in Arduino-IDE
ArduinoJson
ESP32Encoder
```
### Step 1. Open Esp32Full.ino and set Wifi Credentials
```
// #### Change Me - Local Wifi Info ####
const char *SSID = "NETGEAR";
const char *PWD = "12345678";
```
### Step 2. Configure free local LAN IP address
Check your Router for more information
```
// #### CHANGE ME ####
// Set your Static IP address to a free IP in your local network
IPAddress local_IP(192, 168, 1, 8);
// Set your Gateway IP address
IPAddress gateway(192, 168, 1, 1);
IPAddress subnet(255, 255, 255, 0);
IPAddress primaryDNS(8, 8, 8, 8); //optional
IPAddress secondaryDNS(8, 8, 4, 4); //optional
```
### Step 3. Configure ESP_HOST in Javascript File
Edit `./assets/espwavegen.js` and set the IP address used in Step 2 above.
###### TODO: Make configurable in the web interface
```
# Set this to the ESP32's IP address
ESP_HOST = "http://192.168.1.8";
```
Save and close the file
### Step 4. Upload The code in `Esp32Full.ino`
Paste the code into your Arduino-IDE and upload it to your ESP32
### Step 5. Access the WebApp in your Web Browser
Open Web Browser
Open `index.html` in the `WebApp` directory below this file
```
File -> Open -> Browse to WebApp/index.html -> Open
```
Interface is now displayed!
Enjoy!!
## Additional Troubleshooting / Customization
##### Optional: Configure alternate Output Pins
-- Output will be on Pins D2 and D4 by default
```
// #### Output Pins ####
int pinChannel1 = 2;
int pinChannel2 = 4;
```
#### Optional: Adjust Encoder Pins if needed
```
int pulseCount_EncoderPIN1 = 14;
int pulseCount_EncoderPIN2 = 13;
int pulseWidth_EncoderPIN1 = 35;
int pulseWidth_EncoderPIN2 = 34;
int pulseSpace_EncoderPIN1 = 19;
int pulseSpace_EncoderPIN2 = 18;
int gate_freq_EncoderPIN1 = 22;
int gate_freq_EncoderPIN2 = 23;
int pulseWidthModifier_EncoderPIN1 = 27;
int pulseWidthModifier_EncoderPIN2 = 26;
int pulseSpaceModifier_EncoderPIN1 = 5;
int pulseSpaceModifier_EncoderPIN2 = 32;
int gateModifier_EncoderPIN1 = 25;
int gateModifier_EncoderPIN2 = 33;
```
ESP C+ Code to configure local network settings
Git Repo: https://bitbucket.org/cbake6807/esp32-complex-waveform-generator/src/master/
Troubleshooting:
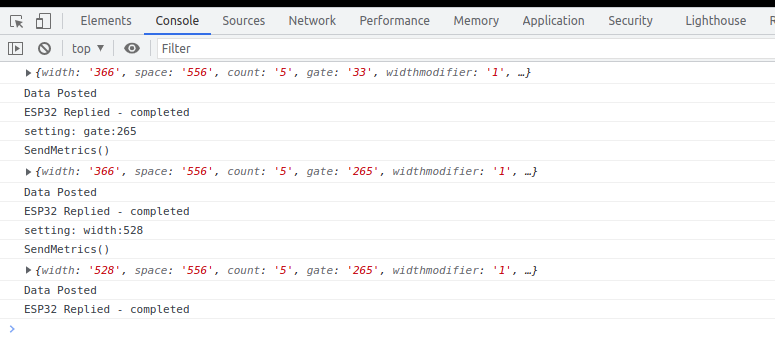
View the Console Log for errors in your browser while clicking the app's sliders buttons etc..
Confirm the ESP is a connected host in your network and was given the IP you specified
https://www.wikihow.com/See-Who-Is-Connected-to-Your-Wireless-Network
# ESP32 Complex Waveform Generator
Arrangement for WROOM-32 or WROVER-E (DevKit-C)

```
# PARTS Required
1 - ESP32 (WROOM-32 or WROVER-32) with 16 exposed pins
7 - Rotary Encoders (i.e. KY-040 Rotary Encoder Module CYT1062)
1 - +5VREG 1A Power Supply for ESP32 (ATX PowerSupply)
```

### Installation Prerequisites
Install ESP Libraries in Arduino-IDE
```
ArduinoJson
ESP32Encoder
```

### Step 1. Open Esp32Full.ino and set Wifi Credentials
```
// #### Change Me - Local Wifi Info ####
const char *SSID = "NETGEAR";
const char *PWD = "12345678";
```

### Step 2. Configure free local LAN  IP address
Check your Router for more information
```
// #### CHANGE ME ####
// Set your Static IP address to a free IP in your local network
IPAddress local_IP(192, 168, 1, 8);
// Set your Gateway IP address
IPAddress gateway(192, 168, 1, 1);

IPAddress subnet(255, 255, 255, 0);
IPAddress primaryDNS(8, 8, 8, 8);   //optional
IPAddress secondaryDNS(8, 8, 4, 4); //optional
```

### Step 3. Configure ESP_HOST in Javascript File
Edit `./assets/espwavegen.js` and set the IP address used in Step 2 above.
###### TODO: Make configurable in the web interface
```
# Set this to the ESP32's IP address
ESP_HOST = "http://192.168.1.8";
```
Save and close the file

### Step 4. Upload The code in `Esp32Full.ino`
Paste the code into your Arduino-IDE and upload it to your ESP32


### Step 5. Access the WebApp in your Web Browser
Open Web Browser

Open `index.html` in the `WebApp` directory below this file
```
File -> Open -> Browse to WebApp/index.html -> Open
```

Interface is now displayed!

Enjoy!!


##  Additional Troubleshooting / Customization


##### Optional: Configure alternate Output Pins
-- Output will be on Pins D2 and D4 by default
```
// #### Output Pins ####
int pinChannel1 = 2;
int pinChannel2 = 4;
```

#### Optional: Adjust Encoder Pins if needed
```
int pulseCount_EncoderPIN1 = 14;
int pulseCount_EncoderPIN2 = 13;
int pulseWidth_EncoderPIN1 = 35;
int pulseWidth_EncoderPIN2 = 34;
int pulseSpace_EncoderPIN1 = 19;
int pulseSpace_EncoderPIN2 = 18;
int gate_freq_EncoderPIN1 = 22;
int gate_freq_EncoderPIN2 = 23;

int pulseWidthModifier_EncoderPIN1 = 27;
int pulseWidthModifier_EncoderPIN2 = 26;
int pulseSpaceModifier_EncoderPIN1 = 5;
int pulseSpaceModifier_EncoderPIN2 = 32;
int gateModifier_EncoderPIN1 = 25;
int gateModifier_EncoderPIN2 = 33;
```
ESP C+ Code
Git Repo: https://bitbucket.org/cbake6807/esp32-complex-waveform-generator/src/master/